Showing posts with label quilt. Show all posts

Tuesday, February 21, 2012

Wonky Stars


I am a member of the San Diego Modern Quilt Guild. And I think the term member is used kind of loosely because there aren’t any dues or officers, etc. But there is a regular gathering every month to get together and sew and share our projects.

There are also a few guild projects that have been undertaken. These wonky stars are one of them. 

Someone donated the following fabric for the backing and handed out swatches to be used for color inspiration.
 

This was my second purposefully wonky project. And I think I was hindered a bit by my scraps. So it was actually more finicky to put together than I think it should have been. But then again I had a learning curve to conquer. I had to learn how to just relax with it and trust some color choices for the big picture, even if I was cringing on the scrappy aspect. I really have a hard time with truly scrappy. I need a little order or rhyme or reason when it comes to fabrics and colors. But I keep trying. (You should see my roses.) 


So, since I haven’t been able to attend a meeting in I don’t know how many months I still need to hand these off so they can get added to the others for a kids' quilt. But I really like how they turned out. This may be an option for a fundraising quilt I want to make. I have a lot of fabrics left over from my bed quilt and I think they would work well in this format. And hopefully be a little easier for me to get scrappy with it. 


Monday, February 13, 2012

Log Cabin Wonkiness and Wonderfulness


Last summer I took a class from Malka Dubrawsky with a wonderfully creative friend. It was so great.

The technique was very much out of my comfort zone – at first! Then I totally got into it. We all brought scraps to work with. And I realized that my scraps are all little girl colors. I had scrap envy for a while looking around the room. Such beautiful colors. We were to create some log cabin blocks, Malka style. Which really means as wonky as you want. No rulers, no straight edge. Now I have to admit that I may have made only one log cabin block before, period. So even that was new to me. 

I think her suggestion was to make 9 blocks to make a small throw. Well I stopped at 8. Which was great. (Ha.) So when I put them together I came up with 2 good sized blocks, about 14-15 inches, kind of almost square.

For Christmas I made them into pillows for the girls (the bug’s cousins). They turned out great. And are well loved. 

(Okay, Linda, does that period go inside the parenthesis or outside?)

Wednesday, October 12, 2011

Block for birthday quilt

This is a block for CeCe's 'big' birthday.

Her daughter sent out a letter to family and friends, with the white square, and said have at it. And then send back to her. Our assumption was that she would work with a friend to put into a quilt for her Mom's big birthday. Actually, she put them in a photo album and CeCe gets to put them in a quilt. I actually like the photo albumn idea if you can't get something done in time, as she has been able to share all the blocks that people sent. It is amazing how many of them you can pick out by the style, the content, the technique and such. Let me tell you, this is going to be one purple quilt.

A friend of ours made one in the same style before the Bug was born. You can see it here. I treasure it. And I hope to be able to make one for someone else one day.

Saturday, October 1, 2011

Cutting it too close

Wow. That was a close one.


This is a kit I purchased at a guild meeting. It is Thai silk to benefit a group that are trying to get girls out of the sex trade there. I'll show the entire quilt later. But the binding made me a little nervous. They definitely cut their fabric to exactly what they think you will need.

See, I have been doing some quilty things...

Thursday, September 22, 2011

Evolution of a king size bed quilt

So, I started collecting fabric. Oh, poor me. I had to buy fabric.

And I made a combination of large blocks and then squares within squares. 
And I went to lay them out. Didn't really like this way. Which is the original way I thought I would love.
Didn't really like this way either. Hmmm. Now what?
So a change is in order. Take out the center square in a square. 
Replace with white. Surround the small squares with white.
Oh, I like this much better.
 Now how many of these do I need for a king size bed? Yikes. Did you say 90 or so?


Almost done.


Saturday, August 27, 2011

Gift Catch Up

I didn't realize I hadn't shown all my gifts I made for Christmas. Which to be honest really wasn't that many. Or rather, it was a lot, but for a small group. I have no idea exactly when it started, but for Christmas I make a 'small' gift for the people I work with. Some of the people I work with. About 8 of the people I work with. This year it was a set of pot holders. So that is actually 16 pot holders.
In years past I made bracelets for the women, knitted scarves for the women, did a whole homemade lavendar theme gift for the women, etc. Last year I bought a christmas panel with 8 designs so I made 8 small wall hangings. I let them choose their style. I just added small borders, quilted around some of the design for effect and bound them. It seems like such a small project, and then you multiply it by 8. But if you can get started early enough, it can be done.
Each set had one pinwheel
and a variation on a disappearing nine patch.
simple backs.

I only wish I had made a set for myself.


Wednesday, June 29, 2011

They say to never do this

But I was having so many problems with my tension that I was willing to try anything. So I did the unthinkable. I adjusted my bobbin tension.


But I took a picture first so I could go back to the same position if it didn't work. It didn't work.

And there are so many things I want to be working on right now....


- Posted using BlogPress from my iPad

Wednesday, June 15, 2011

So close, and yet so far

Don't you just hate it when this happens?


I could have sworn I calculated my binding correctly...Dang it. But then when I went back to my cutting table, there was the missing strip. I felt a little better. But only a little.

(This is the butterfly jar quilt I finished for Bug. need to take pics to show the whole thing.)


- Posted using BlogPress from my iPad

Wednesday, April 20, 2011

How to fancy up your appliqué

I did some fused appliqué trees on my Christmas quilt. And then I started blanket stitching around the ELEVEN trees and of course their bases. Now I know there are some appliqué lovers out there. And bless your souls for having the patience for loving the time it takes to finish it all off. I am not one of them. I am more of a down and dirty, get 'er done kind of project person. So to say that I was enjoying all of that would be a huge understatement. Oh, and my stitching isn't that great so I was not really contributing to the beauty of this quilt like I could have.


And then I went to Road to California and did a little shopping. Really, only a little. And stumbled across a booth that had beautiful appliqué that was finished with this gorgeous shiny ribbon type stuff. That wonder product is actually called hot Ribbon Art made by Junko.


You use a mini iron (thank you Linda) to fuse it down. And it adds just so much. My new best appliqué friend. Okay, not that I had an appliqué friend before. But I really liked the stuff. So not only did it make the job so much easier, it covered said blanket stitch, and added a little fancy to my top.


Wow, I really need to take better photos. Sorry about that....

- Posted using BlogPress from my iPad

Wednesday, April 13, 2011

The pieces of my Chistmas Quilt

Here are the two parts of my Christmas Quilt, the king size quilt I mentioned somewhere.


It has since been put together and is officially at top, a flimsy, another item in the stack of things that need to be quilted.

Oh, I need to tell you about the awesome stuff I used to totally cheat on finishing the appliqué, and that I might say added just a bit of fancy to the things. Hot Ribbon Art by Junko. Love it!


- Posted using BlogPress from my iPad

Monday, April 4, 2011

Cathedral Window Update

Man, I forgot the most important stuff on the Cathedral Window Pillow. I used the tute from Heather at A La Mode Fabric. There is a Part 1 that talks about sizes and ironing oragami and a Part 2 that is the sewing part.

You should try it, really. Just one. And then you can cross it off your "Things I Have Done" list. Unless your mother-in-law wants one too.

Oh, and the fabric is Whimsy by Michael Miller. I think.

Thursday, March 31, 2011

My REALLY BIG DEAL Cathedral Window pillow

I made a Cathedral Window pillow. This is a big deal people. A really big deal.


My usual rationale for making a specific quilt is along the lines of - oh, that looks easy enough, I think I could do that, or I try to make up something similar that I think will be easy and invariably is not because I am making it up as I go.

So to decide, knowingly, to do something difficult, or at least difficult looking, was a bit daunting. But it is totally cool. I made it for my mom. (Isn't it funny that I still make things for my mom because, you know, she has to love it cuz her kid made it. Not that I wouldn't make things for my mom anyhow, but when I do I get that ego boost I need. Works every time.)

I really love it. And, of course, I learned a lot as I did it. In this instance it was my not quite accurate ironing that set the tone for the rest of it. But I did overcome. And that fantastic design element of the buttons, in just the right color, adding depth and texture, at the intersections had nothing to with covering up some not quite exactness. Nothing at all.

So as I was feeling the high of completion I made the comment that I never needed to do another one of those, I could cross it off my list. And my mother-in-law sighed a heavy sigh. So maybe one more......

- Posted using BlogPress from my iPad

Wednesday, March 23, 2011

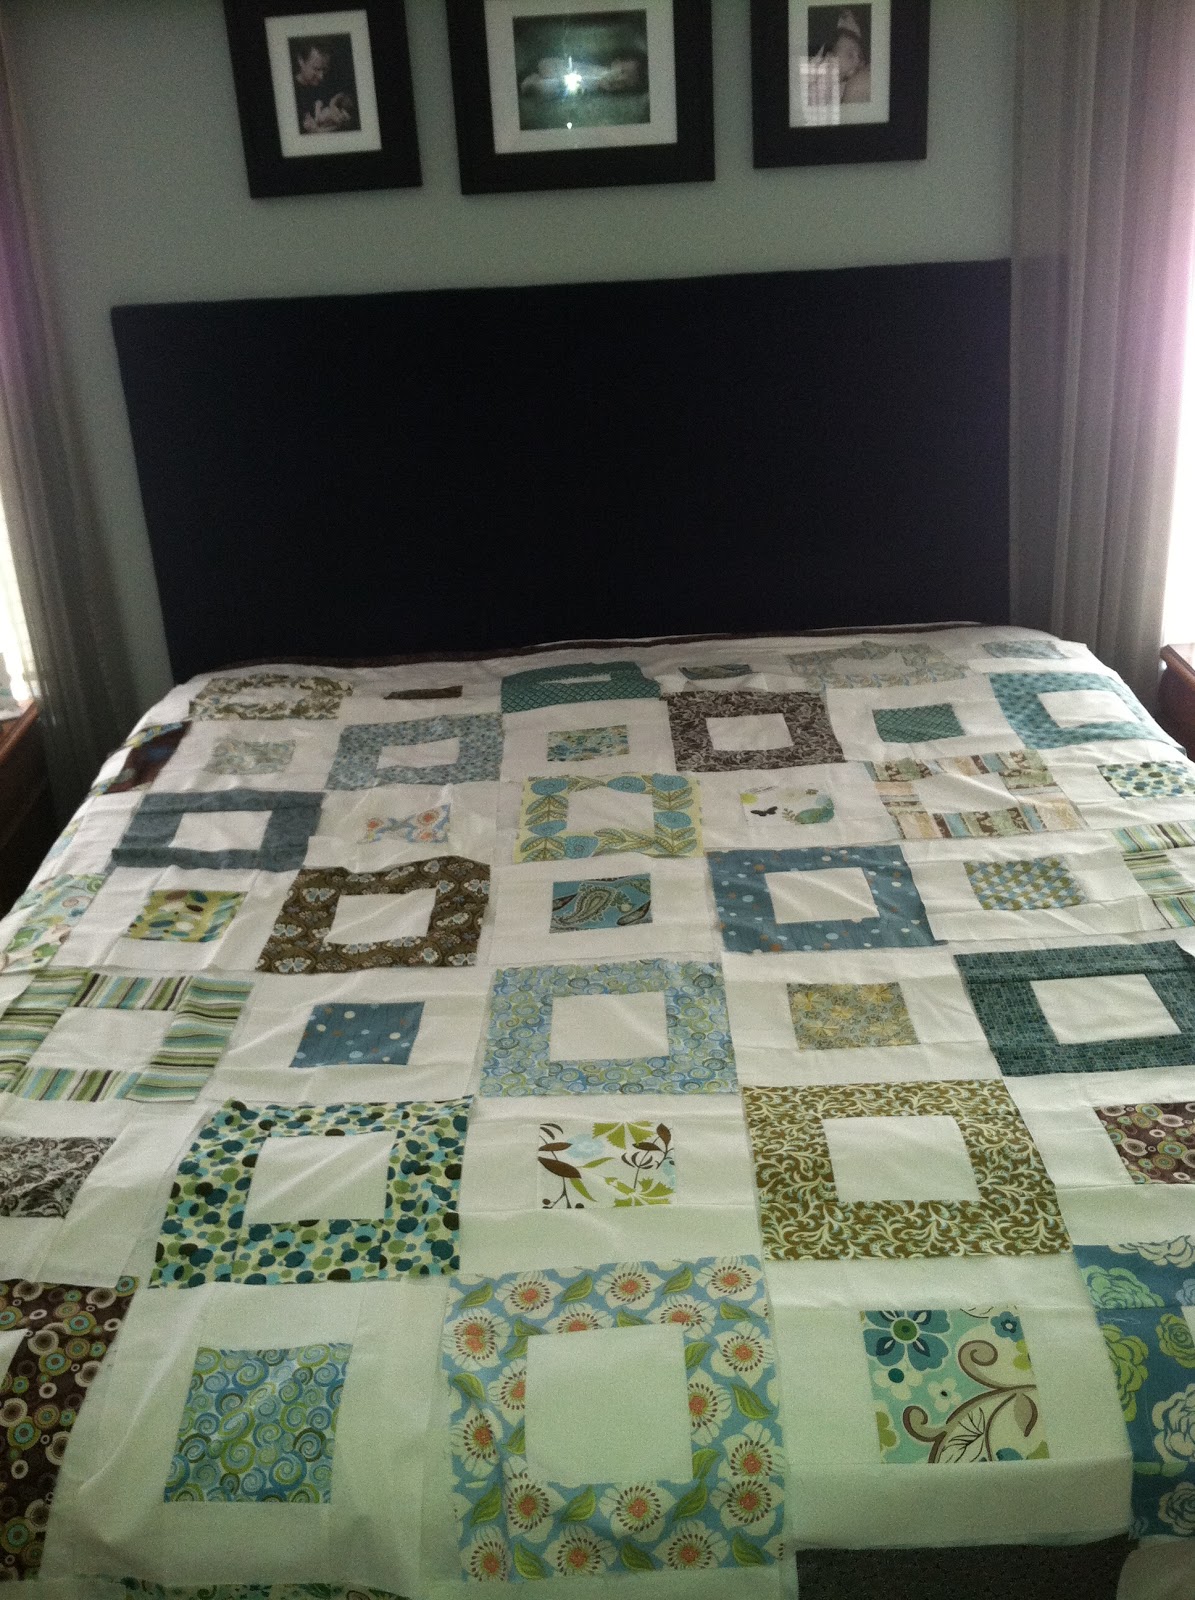
King size quilt for our room

I have decided to do a quilt for our bed. It is a king size bed. I am insane. Actually I think I am insane x2. I just finished the top on a king size Christmas quilt. Okay, maybe not just. I did finish it in January and who knows when this will actually get posted. I had wanted to get it done for last Christmas, but that wasn't happening. Instead, I am really on top of things for next Christmas. And I started and finished the other one while I am still in progress on this one. Oh well.

The color and somewhat the style is based on this quilt I did for my BFF. I made one for us too while I was at it.

It actually did go from these piles of fabric to large squares all cut out. Now to lay it out and make all the 'critical' decisions that just make me freeze in the process. Straight setting or on point? Sashing? Cornerstones? I will invariably hate it as I am putting it all together. Not happy with the look, afraid I really won't like it when it is done. But I am learning to fight through all of those weird fears and just enjoy the process of taking some pretty cool fabric, cutting into little bits, then sewing it all back together again.


I will then have to figure out what the heck to do with two king quilt tops.....to make them magically become actual usable objects for our bed. Hmmm.

Monday, October 11, 2010

Batik Squares

This was my other finish on my super productive weekend. This is a top I did quite some time ago at one of the Friday Night Valet Sewing events at Quilters Cottage. Such a fun night. I think I need to do another one of those.....
I had never really been a big batik fan until I saw the quilts Laura had created. Every pattern she did in batiks was just beautiful. So I had to give it a try. It reminds me of underwater. I really like it.

I quilted across the background squares on a diagonal with a beige/tan veriegated thread. Then used a variegated blue to stitch about 1/4" outside each of the border seams. Simple and it works.


This was another new binding technique. New to me at least. I stitched the binding on by machine. So that line of stitching also adds to the quilting I did.

Gratuitous Bug shot.
Look at just how dang cute she is!!! (Biased, I know.)

Tuesday, October 5, 2010

Whirlygig Christmas


So this has been done for awhile, but life has intervened so I haven't posted it yet. This is one of the quilts I finished in my Very Productive Weekend. I even got soooo productive that I made a matching pillow case. Check it!
Isn't my little helper just the cutest?


Fabric is Sherri Berry Holiday with a white on white snowflake. I quilted (approximately) 1/4" into the white part of the 'gig. And may I just say that trying to quilt straight lines with a free motion set up, not your walking foot, is just a little harder that you think it is going to be. Seriously. But I still love it.


Oh and check out the binding. It has PIPING! So cute. I saw this tutorial at TLC Stitches and wanted to try it. And this was the perfect place to try it. I love the pop that aqua adds to this quilt. Again, a technique that is just a bit harder than you think it will be. It was the ironing that killed me on this. My iron gets very hot, and I have one of those fancy-dancy covers that is teflon or some such thing, that probably gets hotter than the iron. And you are working with a very small little area. But again, I learned so much, and I love the result. As long as I stand back. And don't have on my glasses. And I get the overall picture. And don't look too close at the stitching....


And then, since the detail on the binding added so much, I used one of my fancy stitches that came on my sewing machine that I thought I would never use, and made almost an eyelet trim along the edge of the pillowcase. Because, I mean really, if you are going to go big with the details, then you need to GO BIG with the details.


It is constantly amazing to me the affect that the smallest details have on a peice. I usually get so excited to actually get something done that I rush to finish, and miss opportunities to add a little extra here and there. I'm thinking that might be changing.

Wednesday, September 8, 2010

Eiffel Tower for my Dad

My dad's name is Pierre. He went by Pete for probably 60 years of his life, but in the last 10 or so he has started introducing himself as Pierre. Both of his parents were born and raised in France in a little town called Joigny. I'm pretty sure they were married in France before they came to the U.S. so my dad is first generation American. My dad did not always like his name and growing up and through most of his adult life he was Pete or Peter. Now, he is Pierre. He loves all things French. I cannot count how many vacations he has taken to France. My mom has stopped going with him. She has other countries she wants to see. My sister-in-law always gets him a huge basket filled with everything French she can find throughout the year for Christmas. And he loves it.

So when I saw this pattern I thought of my dad. And when I saw it was a class being offered here, I signed up immediately. The pattern actually is for a wall hanging but I like quilts you can use. (Although I think this one is now hung up. And the one I gave my Mom is also hung. Theirs to do as they choose.) I added much wider borders and didn't do the PARIS applique. I like it just as it is.

(notice my little helpers feet with my big helper? so cute)


The quilting on this one turned out better than I thought. The border fabric is a diagonal lined print so I followed that for the outside quilting. The tower itself is from a fabric with a very tight squiggle, so I followed that for quitling as well. I defined the shape of the iron work on the bottom. And then I was stuck. What to do in the large off-white expanse? Why clouds of course. And they turned out good, if I say so myself. Just the thing. Then a large meander in the beige background.


And here is something you may never see again. A picture of me on this blog. Me in all my no make-up, weird hair wearing glory. And of course, with Pierre. I think he really liked it.

Sunday, September 5, 2010

Using every bit

So in cleaning up a little bit and sorting through various piles I came across this.

And it is the trimmed extra from this back.


Zip, zip, zip (that means sew a few edges together and stuff) and I now have a fun matching pillow for my Figgy Pudding D9P!


Love it!

Monday, August 16, 2010

When last I left you...

I was whirlygigging. I still am, this picture is not current, and I have actually finished quilting it and need to get to the binding. All sorts of other things happening in there as well. More to come....
(Nice design wall, huh? My guest bedroom. There is about 18" between the end of the bed and my sewing table. The ironing board is usually wedged in the corner as well. We have big plans for a new room...someday.)

Saturday, May 15, 2010

Super Easy Super Sized Nine-patch

I ran across this pattern on someone's site. I wish could remember who. This was before I had a blog. Before I knew to a) write it down so you could make the correct references, credit and links and b) write it down because you still have mommy brain and forget everything. It is very easy!(The pattern is easy, writing things down is obviously not easy.)


The original pattern is on the Quiltmaker website. You can download it from there. It calls for three yards of fabric, two cuts, switch the fabrics around and you end up with three tops. I used just two yards of fabric and I used flannel and made it into a rag quilt. A few times. Very very very fast.


The original blog I read mentioned that they had used this for one of their sit and sew days with her guild for donation quilts. That is a fabulous idea.


Dang it. There are those wrinkles again. Maybe I should rename this to "Come see all of my projects with wrinkles" blog. Or "I am too lazy to iron anything before I put it out there for all to see" blog. More likely, "What the hell was I thinking" blog. Oh well, 'tis me.